Confetti Scissors? I love these! Available at the Container Store (and coming to a Michael's near me, soon, I hope!)
Wall Street Journal Market Watch: Princess is the Crowning Style in Japan Fashion ~ Marie Antoinette~ Roses, Frou-frou, Fifi, & More! You gotta see this video~
Kale? Twinkling Topiaries Suspended for Christmas I've always loved kale; but I've never thought of hanging it. Makes a lovely front porch appeal focal point from Thanksgiving to Christmas. Does this remind you of hanging mistletoe balls? Complete photo how-to here.
Decorating Cream Walls with A Sharpie: Pretty Sharp ( Why didn't I think of this?) Although I would never do this, I have to admit it caught my eye and popped both wide open. WOW! On second thought, if I had a basement family area, I really might! You have to check out the WHOLE basement play room to really appreciate how much decor impact this fellow managed with only ten dollars spent on Sharpies. An amazing pan view can be seen here.

Wednesday, November 19, 2008
Tooo Neat!


Thursday, October 23, 2008
A Halloween Invitation...
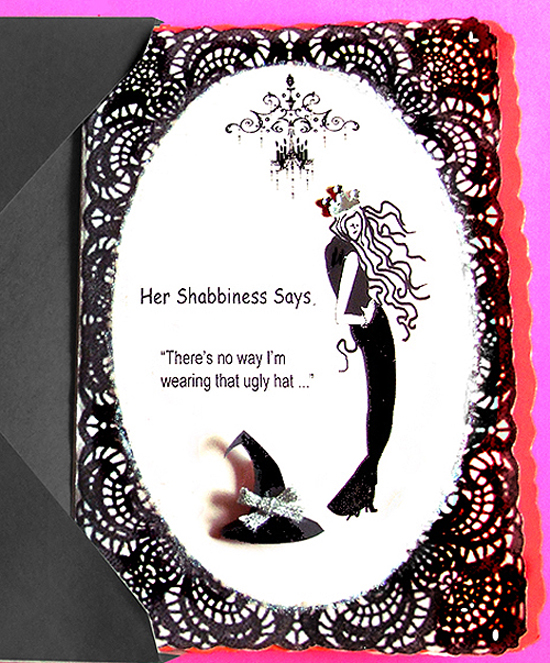

I designed this card to use for a pre-block party planning get-together. I think it might work for any Halloween get-together. Have fun with it!
If you would like to create your own cards from this design:


Saturday, October 4, 2008
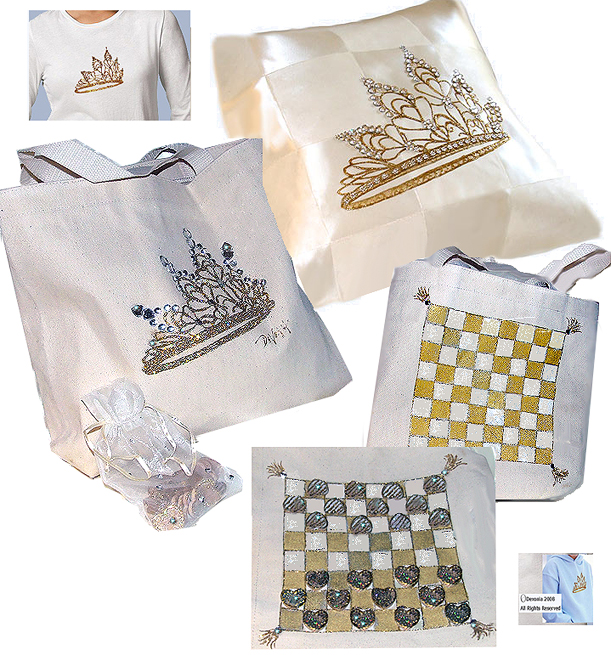
Easy Painting Projects Fit For Royalty: A Royal Tee, Crowned Pillow, and Game Tote with a Crown on One Side That Flips to Checkers-2-Go
 |
I designed patterns for years and years for the arts and crafts industry. I tried hard to create versatile patterns, patterns I loved myself. The best part about creating the patterns was hearing from customers how much they enjoyed them; whether for gifts or for creating things they could sell at craft fairs, or just for their own home and personal use.
I've been working on some patterns to offer on my Many Shades of Shabby Catablog. I'm working on several at a time, and hope to fill it up soon.
I just added this first one that I had so much fun creating. It's for fabric painting, but of course, it's easy to see that the design might go on many surfaces.
This pattern begins with a glitzy crown loaded with sparkling gems. It's really simple to use the pattern - on most medium or light weight fabrics, all you have to do is slip it beneath the pattern and trace it before you paint it. Above, I'm marking off the squares for the pillow cover and you can see the design beneath the satin fabric.I just added this first one that I had so much fun creating. It's for fabric painting, but of course, it's easy to see that the design might go on many surfaces.

I made the pillow out of scraps of an old vintage wedding gown I purchased at a thrift store. It really turned out elegant and I love it. But the pillow is just as elegant made of plain old muslin.
What I really find a delight to do was the Game Tote.
I thought the game tote would make a great place to store all those little things it takes to play a game. I couldn't help but think what a sweet gift this could make as a set for a little princess-who could sleep in the tee, pack overnight things in the tote, and she and her friends could play checkers right on the bag. How much fun would that be?
These look lovely in different colors. Now why does pink and silver glitter come to mind?
The crown is shown on a tee and a hooded sweat here, but wouldn't it be sweet on a night tee, the long ones?
Wednesday, September 10, 2008
Pretty, Practical & Fun to Make: Wearable Coasters

This holiday season my wineglasses are going to wear their coasters on their feet - no more nasty tabletop circles for me. These wearable coasters can be made from recycled holiday greeting cards, comic strips, newspapers, old cds, gift wrapping or even plain brown paper. The coasters are a fun, rewarding project - pretty and practical for your holiday entertaining.
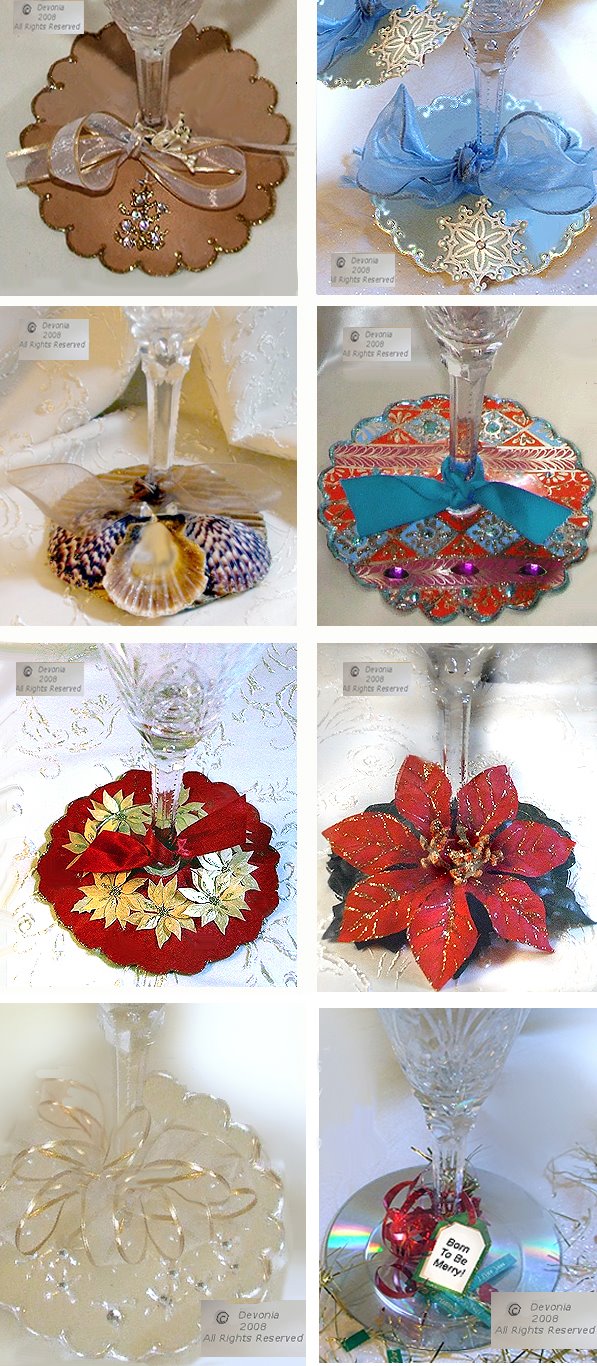
In fact, relying mostly on my old holiday trims, I made dozens of the coasters in different designs, and the only thing I had to buy was the dimensional paint to finish the scalloped edges and add sparkle. I used FolkArt Dimensional Fabric Paint by Plaid, available online. Sigh.. take a look at these eight designs and maybe you'll agree - Recycling is sooo satisfying.
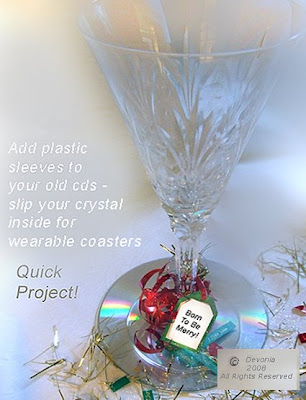
You can add see-through pockets to old cds for a WOW! wearable coaster, filled with confetti . Trim the wine glass with curled ribbons and tuck in a fun tag and you'll be ready to say you were "Born To Be Merry!"
See eight fabulous designs for holiday and casual party events following
See eight fabulous designs for holiday and casual party events following
 Subscribe in a reader
Sunday, August 31, 2008
Transform Your Family Photo Into A WOW Painting

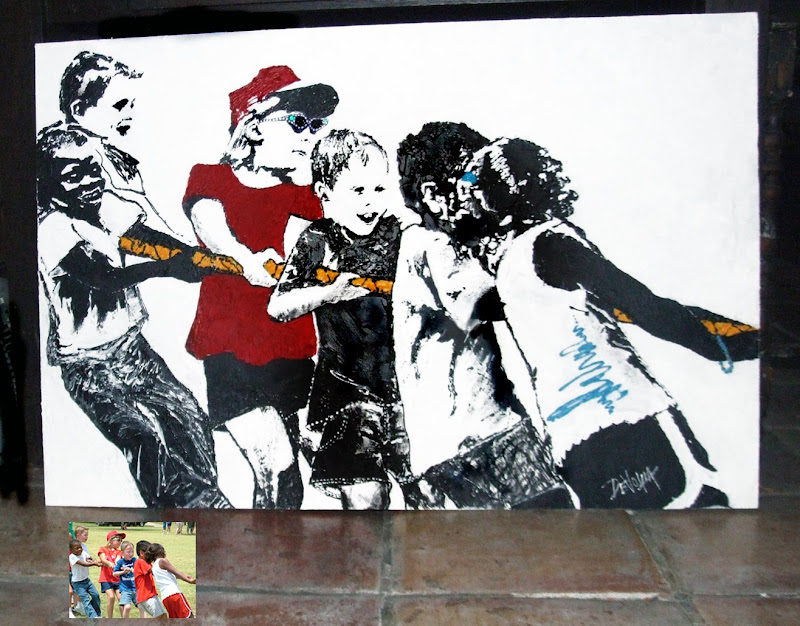
Do you have a great family photo that you would love to turn into a huge personal painting for your home? Maybe that super shot of your hubby breaking the finish line in first place in the marathon, or granddad hammering together a wood rocking horse, or even a family shot eating hot dogs that you just love? Could be your rec room would be the perfect place for paintings of your little girl going through drill team exercises and your little boy hitting that homer- maybe your office would lighten-up if you had a painting of your baby in the tub splashing water up to the ceiling or your toddlers making wishes as they blow away dandelions. Would this make a perfect gift for someone special?
You could never paint something like this? Well, maybe you could... I did. It was like "coloring".
I'm so very excited about the potential of this paint - HD High Definition by Plaid. My artist's heart wept when I realized how much was possible with it. The paint is being touted as an alternative for oils and demonstrated used for traditional art. It is sooooo fine in its own right that I wanted to design to take full advantage of the dimension and texture it offers - plus take advantage of how easy it is to use. Amazing stuff...
It was so easy to completely convert this family photo of my grandson on playday to an art painting for his room.
I just tweaked my photo, sized it, printed out the numbered pattern, transferred the pattern with graphite transfer paper, selected my colors and started painting.

I had the " mdf canvas" cut at Home Depot, 24 x 36 . I primed it with shake and rattle Kilz, worked on printing the patterns while the primer dryed, and once the pattern was transferred, knocked it right out that afternoon. Though I blocked in some of it with Plaid acrylic matching paint, most was straight from the bottle HD paint. The squeeze bottles have a tip that can be used for fine detailing and effects or you can brush or apply this paint with a pallette knife. I did a little of all of it.
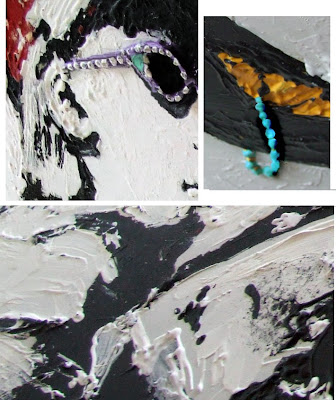
I let it cure for a few days and then sprayed it with a matte sealer cuz I don't like shiny - but, wow, I love this texture! Check out the beaded bracelet & dimensional sunglasses. Who could imagine paint could do that? I love it!
Instead of a frame, I've chosen to hang this with exposed industrial hardware clips that can be painted bright colors or left silver. I'm going to leave these silver, I think.
My grandson is the little fellow in the center. I think this will be great for his room. Hope he likes it.
NOTE: I'm receiving many questions about transferring the pattern so I'm following up with additional pattern information.
I sized the " photo pattern" and converted it into actual inches that would work for the art piece. With a software ruler snapped to the resized and tweaked image (now grayscale, more than a line drawing but less detail than the photo) , I sectioned the big pattern into appx blocks of 8 x 10 so my printer could print them out. I numbered the pages so I wouldn't get lost. Printed each page of the pattern out, taped the pieces together so that all of my lines met, covered my board with sheets of graphite paper, placed the pattern over it and traced over it with a ballpoint pen, pressing pretty hard, to transfer it.
It took longer to transfer the pattern than to paint it, I think. And I could have done a better job if I had been precise in my transferring of the pattern.
Hope this helps. If not, it's really ok if you use the email link below to contact me. I'll try to help.

Subscribe to:
Posts (Atom)
 Thank you, Celestina, for this beautiful *"Arte Y Pico Award".